Welcome to Mega Man X Online: Deathmatch! This page gives a comprehensive guide on how to play the game, configure settings, and useful hints/tips to let you pick up your game and kick some reploid butt!
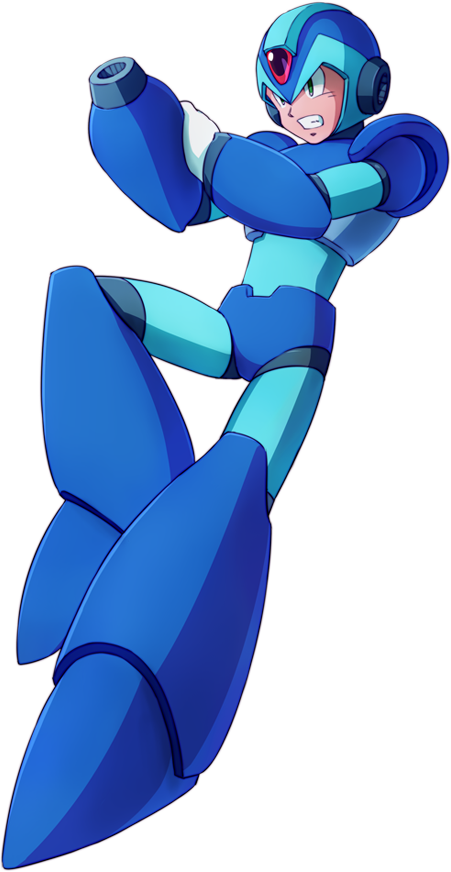
Mega Man X is the eponymous protagonist of the Mega Man X series. He was the successor of the original Mega Man and is Dr. Thomas Light's greatest creation. X is a Maverick Hunter who fought alongside his partner Zero in order to maintain peace and stability in the world and protect humans and Reploids alike from Maverick Reploids, though X would like nothing better than the opportunity to stop fighting.
X is the game's main ranged trooper. His primary attack is shooting whatever weapon he currently has equipped. By holding down the attack key, you can charge your weapon. Keep in mind that all weapons, including the X-buster, run on limited ammo, so place your shots wisely. However, certain maps have infinitely respawning ammo pickups available where you can refill your supply.
Also keep in mind that having a weapon equipped makes you weak to a specific other weapon! This weapon corresponds to boss weaknesses in the real game, so for example if you have shotgun ice equipped you will be weak to fire-wave and take double damage from it! Note that the X-buster does not have any weakness.
X can dash, jump and climb, like in the real games. He can also do an air dash. However, unlike Zero, he lacks a double jump.
As X, you are a generalist and the game's primary frontline soldier. In team modes, you form the backbone of a solid team with a reliable ranged weapon that can take out opponents at range and even off-screen. In FFA modes, you play aggressively yet carefully, keeping your distance from Zero and other X's, and retreating when necessary.
In general, X is more of a defensive character. He can quickly shoot down flag carriers without having to chase them down. He is also extremely versatile, with a vast array of special weapons available to choose form depending on the situation. As X, you should constantly evaulate the flow of the game, considering which weapons allies or enemies have equipped, whether a flag needs to be defended from heavy attack, or the distribution of X's and Zeros on your team or the other. Overall a more strategic, defensive tactician.
When fighting another X, weapon weaknesses are key. Because certain weapons do double damage to other weapons, you'll want to pick a good variety of weapons that can cover each other's weaknesses, and switch out if you are weak to a foe's weapon. In certain cases it is possible to fight against a weakness, such as if they are low on health and there are other foes nearby actually weak to your weapon, but generally it's not recommended.
Another thing you should keep in mind is your current health and ammo, and theirs possibly. If you are low on health it is ill-advised to fight a head-on battle. You should use charged shots, playing defensively, try to pick them off with off-screen shots, as you search for health. The same applies for low ammo situations. Note that if you have even one bar of ammo left, you can still do a charge, so make use of this tip as much as possible to squeeze out the most use of your remaining supplies!
Zero was designed as an aggressive melee warrior while X is more of a ranged defender. As such, you should attempt to "kite" a charging Zero whenever possible (repeatedly retreat with jumps/dashes and shoot), especially with charged shots that will cause him to flinch, buying time. Watch out for ambushes from above or below, as Zero is very scary if he can get in your face unexpected.
Bear in mind that Zero can reflect many of your projectiles (!) with his sword swings so avoid the X-buster, Chameleon Sting, Electric Spark or Shotgun Ice whenever possible. The last thing you want is to spend time charging a shot, only for it to come straight back and take you down!
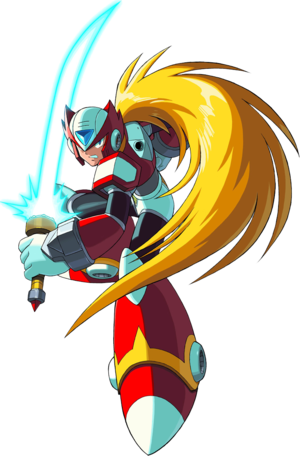
Zero is the deuteragonist of the Mega Man X series. He is the successor of Bass and the greatest creation of Doctor Albert W. Wily. A high ranking Maverick Hunter and legendary freedom fighter, he's a die-hard warrior who doesn't hesitate to take action. However, behind his cold and emotionless attitude lies a wounded soul.
Zero is the game's main close-ranged specialist. His main attack is a sword swing. Press the attack buttons 3 times in succession on the ground to do a melee combo; the third hit in the combo causes a flinch, deals extra damage, and shoots out a limited-range projectile that can damage enemies close-by (but it dissipates after travelling about half a screen distance). You can also attack when dashing to do a dash attack, good for closing in on enemies and damaging them at the same time. Midair attacks are also possible.
In addition to all of X's movement abilities, Zero can also double-jump when in the air, but only if he has not already dashed in mid-air, and double-jumping will prevent a following mid-air dash.
Finally, keep in mind that Zero's sword swings can even reflect projectiles shot by X! The X-Buster (all charges) can be reflected, as can uncharged Chameleon Sting, Electric Spark and Shotgun Ice. However this requires some careful, skilled attack timing. Only attempt a reflect if the pros outweigh the cons. You may have an easier time reflecting with the midar attack, although this makes you more predictable.
As Zero, you are an aggressive close-quarters-combat and ambush character. You close in on your opponents and quickly dispatch them with combos from the high-damaging z-saber. In team modes, you charge in the battle and let your X allies shoot unimpeded. In FFA modes, you relentlessly hunt down other maverick hunters, ambushing whenever possible to prevent retreats.
Zero is great for flag pickup and capture since he can still use all his abilities when holding the flag, unlike X who loses the ability to charge his weapon. His double jump also lets him take various different shortcuts and paths depending on the map, and take a breather when he does need to retreat.
Consider playing Zero aggressively even when on low health, as his high damage is capable of dispatching opponents regardless of how close he is to dying, and he can always get in a lucky reflect to pick off an X trying to finish him off. Try to string together combos, such as initiating with a dash attack, doing a ground-combo, then jump-cancelling and doing a midair attack, and repeating the process. Overall a powerful warrior, but he does take some skill to use, like in the real games.
Fighting X can be a high-risk, high-reward endeavor. On one hand, if he sees you coming, he can easily dash away and shoot, dash away and shoot, ad-infinitum, a gameplay technique known as "kiting". On the other hand, if you can quickly and unexpectedly get in range you will eliminate him fast. As such, avoid head-on assaults whenever possible and try to ambush from above, below or behind. Sandwiching an X with a zero ally, or cornering an X, can also be devastating.
Consider trying to reflect an X's projectiles if he is using a reflectable special weapon and casuing problems with it. Only attempt this at a distance, since doing it at point-black will not work, and the timing is more challenging the closer you are. Slow projectiles fired off-screen are easier to reflect and should be reflected whenever possible. Consider going after X's with reflectable weapons as this makes them weaker to you. If an X is attempting to charge their weapon, attack until they are close to complete, then back off, and attempt to reflect or bait out the charge whenever possible.
Zero vs Zero is a battle of skill and timing. If your sword clashes with an enemy Zero's, they will block each other and cancel out. Whoever can better time their attacks and pull off faster sword swings will generally prevail. Remember that your ground combo is the most damaging and should be generally preferred unless you are transitioning from one movement state to another, or initiating an attack. If fighting another Zero with higher health, try to avoid a head-on ground duel, and instead poke and harass with midair attacks. If you are surrounded, consider spamming your midair attack, which is great for attacking enemies from any direction.
Damage: 1
Cooldown: 0.15
Charge Damage: 2/4/6
X's main weapon in the games, this is probably the most versatile and general-purpose assault weapon available. It has decent firing rate and speed, lacks a weakness to another weapon, and can charge with up to four different levels. However it doesn't have any outstanding traits or utility and tends to chew through ammo quickly (unlike in the real games, this weapon has an ammo bar for balance purposes). When in doubt, pick this weapon - it forms the backbone of a solid composition.
Damage: 2
Cooldown: 0.5
Charge Damage: 3 x 5 torpedos
The only weapon in the game that can home in on enemies, but hampered by a slow firing speed and the ability to be destroyed by any damaging weapon in the game (aside from other torpedos). This weapon is good in wall-heavy maps that don't have a lot of straightways, where the homing effect would be of more use. The charge is great for hunting down single players, or spreading damage across a variety of foes, but even its projectiles can be destroyed. Overall a great harassment tool, but avoid using it as a front-line assault weapon as it's easily destroyed.
Damage: 2
Cooldown: 0.75
Charge Damage: N/A
The uncharged shot deals decent damage, and if you can aim the pellets carefully, you can "meatshot" by hitting with all three of them at once on an enemy, dealing heavy damage. The charge turns X invincible for 10 seconds, making it great for escapes and reaching the flag, but like with any weapon charge, you cannot use it when carrying the flag. You can also use the invulnerability to access otherwise lethal parts of the map such as lava or spikes and pickup goodies sprawled upon them.
Damage: 2
Cooldown: 0.75
Charge Damage: 2 per hit
Fires spheres of rolling energy that can block projectiles and damage enemies alike. The charged version grants a protective barrier that can damage enemies X runs into, and block all projectile weapons (except electric spark, which immediately destroys it). Each hit the shield takes drains ammo, and if ammo runs out, the shield is lost. A great defensive tool; if under heavy assault from projectile weapons like the X-buster, consider this weapon, but bear in mind it does nothing to block Zero's melee attacks.
Damage: 1 per hit
Cooldown: 0.05
Charge Damage: 2 per hit
The uncharged version is a powerful short-ranged weapon that can turn X into a "mini-Zero" of sorts, making him a monster at close range. However, it suffers from the same problems as Zero's restricted range, and burns through ammo quickly. The charged version will shoot a wave of fire that travels forward and reverses direction if it hits a wall, making it a great area-denial tool.
Damage: 1 per hit
Cooldown: 1.5
Charge Damage: 2 per hit
This is the only weapon in the game that can actually move enemies, making it great for area-denial and flag defense. The uncharged shot will blow enemies away and cause slight damage, but has a long cooldown. It's also great for dealing with groups of enemies as it has an area-of-effect. The charged version launchs a towering vertical projectile that covers the entire map's height, making it excellent in vertical-oriented maps such as the Tower stage, but less effective in horizontal ones like Central Highway.
Damage: 2
Cooldown: 0.5
Charge Damage: 4
Fires slow-moving electric balls that, upon hitting a surface, split into two. While the default shot is fairly unremarkable, aside from hard-countering Rolling Shield, the charged shot is extremely powerful. Despite its low damage, it covers horizontally left and right across the entire map, so you can damage entire teams or servers! The charge is great on horizontal maps such as Central Highway but less useful on vertical ones like Tower.
Damage: 2
Cooldown: 0.5
Charge Damage: 4 x 4 boomerangs
Shoots boomerangs that curve in a circular path and, if they do not make contact, return to X and refill the lost ammo spent firing the shot. Firing while jumping makes it curve downwards. This weapon can pick up health-packs out of reach, making it great on certain maps such as PowerPlant. The charge shot fires 4 damaging projectiles that oscillate from X radially, making it great if you find yourself surrounded by opponents, or just as a general purpose form of high damage.
Damage: 2
Cooldown: 0.75
Charge Damage: 4 (sled)
The uncharged shot fires a projectile that splits into 5 fragments when it hits a wall. With clever placement, you can cause a lot of damage with the shards, or even hit all 5 on a single foe at once for heavy damage. The charged version, unlike in the games, shoots a gust of icy wind along with the ridable penguin sled. This will freeze enemies on contact, making it great for taking out a good chunk of opposition at a time. Use it for escapes, flag captures, and generally if you find yourself being outnumbered or flanked. A particularly clever technique involves freezing an enemy over a pit or spikes, thereby leading to their deaths. Try using the charge on enemies at the tip of the gust, as this will allow the penguin sled to also damage and combo them while frozen.